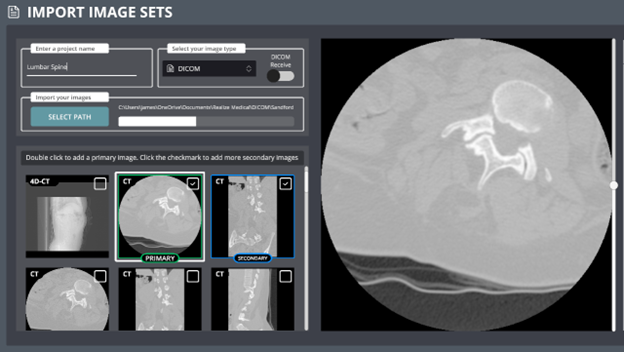
Importing DICOM Images from Your PC
Follow these steps to import DICOM images into your project:
1. Create a New Project
Click New Project.
Name your project.
2. Select Image Location
Press Select Path.
Navigate through your PC to the folder where your DICOM images are stored.
3. Review Your Images
Once the images have uploaded, use the scroll bar on the right to cycle through them.
Confirm that the image set is correct.
4. Finalize Import
Press Create to complete the import.
Managing Multiple DICOM Image Sets
If you’ve imported multiple DICOM images:
Set a Primary Image
Double-click on an image thumbnail to make it your primary image.
A green box will appear around the thumbnail.Set Secondary Images
Check the box in the upper-right corner of a thumbnail to mark it as secondary.
A blue box will appear around the thumbnail.
You can add as many secondary image sets as you need.